|
|
|
|
|
In the Forums... |
Posted: February 10, 2006 Written By: Dan "Tweak Monkey" Kennedy Introduction This guide was written to help you fix issues with file and print sharing for Windows XP. File and Print Sharing is Windows' method of networking printers and files, allowing you to browse shared files from one PC on another over a network and use printers from other PCs. F&PS is one of the most useful features of a network, allowing a single PC to act as a server for a printer and files. While it's usually not difficult to activate this service, troubleshooting it can be a chore. This article is quick and easy to follow, featuring six steps that will fix just about any file and print sharing bug you'll run into with Windows XP. These steps also apply to Windows 2000 and some can be used to for older versions of Windows. This guide assumes you already have a functional network. If you need help setting up your network, read our guide on basic networking strategies or read this guide on Microsoft.com -- for troubleshooting check our the forums. Step 1: Service Pack 2 Service Pack 2 fixes many networking issues in Windows XP and tends to smooth out some problems with F&PS. Check to see if your PC has Service Pack 2 installed by hitting the Windows and Pause/Break keys simultaneously, or right click My Computer and choose Properties. Toward the top of the General tab, under System it will show you the Service Pack #. If none is listed, you don't even have Service Pack 1 yet. If you've already got SP2 installed, move onto the next step.  Service Pack 2 is a free download from Microsoft.com but your operating system software must be legitimate. To install Service Pack 2 go here. It will take a while and you'll need to restart your PC when it's finished. Step 2: Services Hit the Windows and R keys simultaneously to bring up the Run dialog (or Start, Run). Type services.msc and hit Enter or OK. Find these four services: Computer Browser, Network Location Awareness (NLA), Server, and Workstation. For each of these, open up the Service by double clicking or hitting Enter. Set Startup Type to Automatic, then click Start for each service then click OK. Some might give an error. Ignore this for now and move on. This turns on the required services to make F&PS function without issues. Step 3: Network Setup Wizard 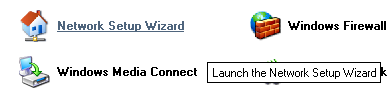 Choose Start, Control Panel, then go to Network and Internet Connections if it's available. Next go to Network Setup Wizard. Hit Next through the menus until you reach Computer Description and Computer Name. It might be useful here to give each PC an easy to use unique name for future networking. On the next screen, you'll type the workgroup name (MSHOME is default). Keeping all the PCs on the same workgroup makes F&PS easier. Next turn ON File and Print Sharing only if you plan to share FROM this computer. If this computer is only going to access other PCs' files and printers, don't worry about turning it on. Click Next a couple more times, then choose Just Finish the Wizard; I don't need to run the wizard on other computers. Repeat steps 1 to 3 on all PCs on your network, keeping unique computer names and the same workgroup. At this point, most PCs should be able to see each other. You may have to reboot each PC to see everything correctly.
Next Page - Set Up and Access Shared Files and Network Printers
|
||
|
| |||
|---|---|---|---|